Stistics

2018年2月28日星期三

Quick guide for MLK500 High speed programmable pattern sewing machine


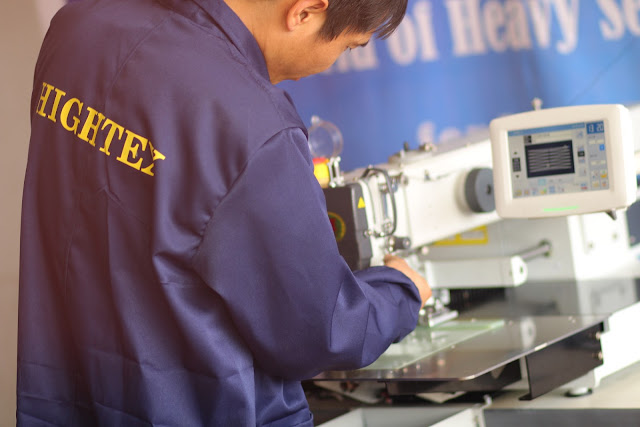
Hightex MLK500 serial high speed programmable pattern sewing machine can make a revolution in your sewing production of cargo lashing straps, safety harness and seat belts.

The apparent advantage is its 3 times large rotary hook which can easily sew heavy duty webbing straps with thick thread up to metric size #10 (=T-270, V277, 840dx3).

Here is the Quick Guide to help you start your MLK500 automatic sewing machine. If you have any additional question, please contact our technician at info@automatic-sewing.com.

All Hightex automatic programmable sewing machines are completely installed, tested and serviced, ready to operate. When you open the plywood box, you will see the machines in below condition, now you just take several steps to prepare for sewing.  


Step.1 Open the cabinet, take out the accessories


Step 2. Pass the cable of Operation Panel through steel tube as below figure:


As well as the base on table (see below figure):


Step 3. Install the Operation Panel as below figure:

Step 4. Connect the cable of Operation Panel to the Electronic Control Box (inside the cabinet) as below figure. The plugs are exclusive, do not worry about wrong connection.


Step 5. Pass the cable of  Pedal Switch through the hole as below figure:


Step 6. Connect the cable of Pedal Switch to the Electronic Control Box (inside the cabinet) as below figure. The plugs are exclusive, do not worry about wrong connection.

Step 7. Install the thread stand as below figure:


Step 8. Connect the machine to air compressor by 8 mm (Dia.) air tube as below figure:


Step 9. Check the gauge as below figure, make sure the air pressure is 0.5-0.6 Mpa. It is very important! If the air pressure is not enough, the needle might hit clamp (sewing frame) might, and caused damage!!
Step 10. Oiling-------To keep your automatic sewing machine in good running condition, be sure to keep your machine properly oiled

10.1. Fill the upper oil tank as below figure, and check oil window, make sure the oil tank is full. We recommend that you check the oil window every 1 week.


10.2. Fill the lower oil tank as below figure, and check oil window, make sure the oil tank is full. 


10.3. All lubrication points RED marked on the following three pictures must be given a few drops of oil daily.


Step 11. Plug 220-240V, 50-60Hz electric power, as below figure: 


Step 12. Turn on the machine, as below figure: 


Step 13. Insert the clamp (sewing frame), as below figure: 


Step 14. Shake the clutch under table (as below figure #1), for locking the clamp (as below figure #2):


Step 15. Install the bobbin to built-in bobbin winder on top of machine, then , wind the bobbin (check here for detail-------http://sewingtechnology.blogspot.com/2018/03/winding-bobbin-thread-of-mlk500-pattern.html)


Step 16. Install the bobbin as below figure:


Step 17. Threading: 

Clicking the key marked with red arrow (as below figure #1), then thread your automatic pattern sewing machine as video on youtube------- https://youtu.be/_YZ5_2Jsk8Y


Step 18. Open the cover of Emergency Stop Switch, as below figure:


Step 19. Click below key (mark with RED arrow), move the needle and clamp to zero position. 


Step 20. Click below pattern numbers (mark with RED arrow), select right sewing pattern. 


Step 21. Press the right pedal, to down the clamp. The machine can be with 2 different settings:  close left and right clamps separately (recommend for cargo lashing straps or safety harness) or close both clamp together (recommend for webbing belts). If with separate down setting, you need to press the right pedal for 2 times.


Step 22. Trial sewing: press on the key marked with RED arrow, the machine will give a sewing simulation. The purpose of sewing simulation is make sure the needle work within clamp, without any conflict.   

Step 23. after a successful sewing simulation,  click below key (mark with RED arrow), move the needle to first stitch position (start point).

Step 24. Put the material, press right pedal to close clamp, then  press left pedal to start sewing production. 


Step 25. 
Maintenance-------very important!!

25.1. Using air gun, remove the dust and the thread waste sticking the threading parts or the hooks area, as below 2 figures:


25.2. Check the oil window of oil tank. If the oil is  under the red mark level, add oil again, as below 2 figures:


More heavy duty automatic sewing machines refer to our official website at http://www.cowboysew.com/product7.htm

2018年2月25日星期日

Instruction for 828 Hot Knife webbing cutting machines

Hightex 828A/828B is fool-proof, easy-to-use hot knife cutting equipment for heavy duty webbing slings and strap industry. Here is the basic instruction for guiding you to use this machine.

Brief:

A. Load the webbing straps into as feeding bracket as last picture in below instruction;
B.Check air pressure (no less than 6 kg);
C.Turn on the power switch;
D. Open the air pressure valve again;
E. Set the parameters till the temperature reaches predetermined value.


1. Connect to air compressor as below, the machine requires 0.5-0.6Mpa of air pressure.


2.Connect to 220-240V, 50-60HZ electric power, then turn ON the machine by Power switch


3. After turn on the machine, you can see below interface:


4. Setting of parameters (cutting length, quantity, feeding speed, temperature and time delay etc), Press key of "SET", enter below interface, then set the parameter step by step:


1) The cursor indicated in the first parameter: Number of work, press CLE to reset (zero clearing), then input new working number. This number is the count of production quantity. For example if you input 1000, the machine will be automatically stop after 1000 cuttings.

Note: before set each of below parameters, please zero clearing. 

2) Press SPEED (+)/SPEED(-), move the cursor to second parameter: Length, press CLE for zero clearing, then input a new number. This number is the cutting length of webbing strap. For example if you input 1000, the length of each cut straps is 1000mm.

3) Press SPEED (+)/SPEED(-), move the cursor to 3rd parameter: Speed, press CLE for zero clearing, then input a new number. This number is speed of material feeding. Smaller value means lower speed, bigger value means higher speed. When you set the speed, please consider material of webbing (Nylon, Polyester, Polypropylene,  Kevlar etc), and thickness of webbing. Recommends an empirical value of 4-5 for 828A, and 9-10 for 828B.  

4) Press SPEED (+)/SPEED(-), move the cursor to 4th parameter: Temp switch, input "1" for turning ON switch, input "0" for turning OFF switch. When you input "0", the machine will not heat blades.

5) Press SPEED (+)/SPEED(-), move the cursor to 5th parameter: Set the temp, press CLE for zero clearing, then input a new number. This number is temperature of blades. When you set the speed, please consider material of webbing (Nylon, Polyester, Polypropylene,  Kevlar etc), and thickness of webbing. Recommends an empirical value of 400 to 450.

6) Press SPEED (+)/SPEED(-), move the cursor to 6th parameter: Time Delay, press CLE for zero clearing, then input a new number. This number is waiting time of each cutting action (dwell timer). For example if you input 15, the blade will down to material, wait for 15 seconds then lift for next cutting. Recommends an empirical value of 15 to 20 seconds.

7) The default value of 8th parameter(Wheel length): Adjusting the wheel length parameter: the factory defaults setting is 180 (with encoder), that means the wheel turn one circle, the cutting length is 180 mm. The  defaults setting may have deviation (57.4% 3.14 ≈ 180) because of the difference of webbing strap. So if you found that the actual cutting length of webbing strap is different from set value, you need to adjust to this parameter.
If the actual cutting length is shorter than setting value, please reduce the wheel length. 
If the actual cutting length is longer than setting value, please increase the wheel length.

8) Press OK to save and quit setting.

5. Insert the webbing straps, and adjust the material guide.


6. Waiting for machine heating. When the actual temperature rise to set value, press Sta/Stp for starting work.

During the work, if you want to stop machine, press BACK, press Sta/Stp again for re-starting work.


7. Manually setting.

when you trial the machine, you night manually set below parameters:

FEED 1  ---------- Feeding the material forward
FEED 2  ---------- Feeding the material backwar
CUT.1   -----------  Press one for one cutting, this is for testing temperature, to check if the current temperature can cut off the webbing strap. If not, try to set higher picture or increase time delay.
TEMP+  ----------  Increase the temperature of hot knife
TEMP-   ----------  Reduce the temperature of hot knife

Press CLE, then press "1", clear the total number.

If you have any additional question or concern, please contact us at info@automatic-sewing.com, thanks!

If you know to know more about the specification of 828A or 828B, below check below linkages


If you are interesting in relevant automation webbing sewing machine, please check below linkage:

http://www.cowboysew.com/product7.htm