Hightex 7273PLK/R Automatic rope bar-tacking machine to make sewn eye termination: the second generation of extra heavy duty automatic bar tacking machine with higher sewing speed and robust construction; Can easily stitch 2 ropes with each of 20 mm (diameter).
Watch video on youtube: https://youtu.be/QFiicwLBdUE
Now we show you how to program a new sewing pattern. To obtain high quality seam, the finish zigzag width should be 2mm over diameter of rope, for example, 8mm ropes, the third zigzag width should be 10mm, for 10mm rope, the 3rd zigzaq width should be 12mm, and for 16mm rope, the 3rd zigzag width should be 18mm.
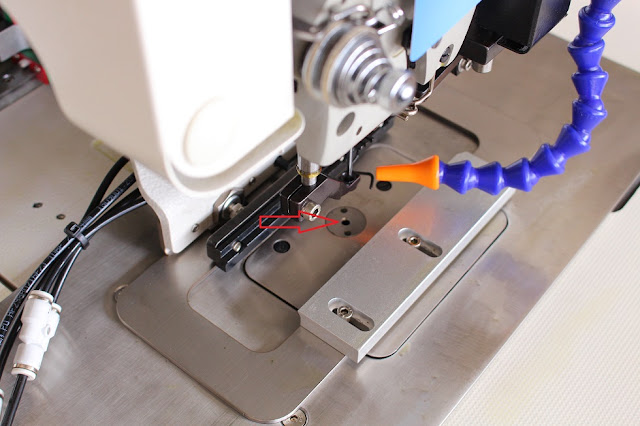 |
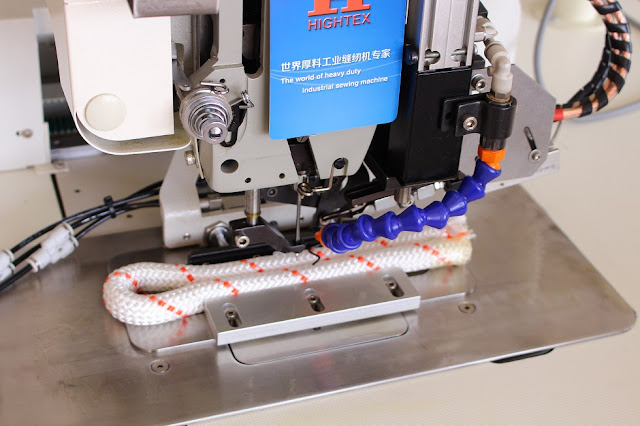
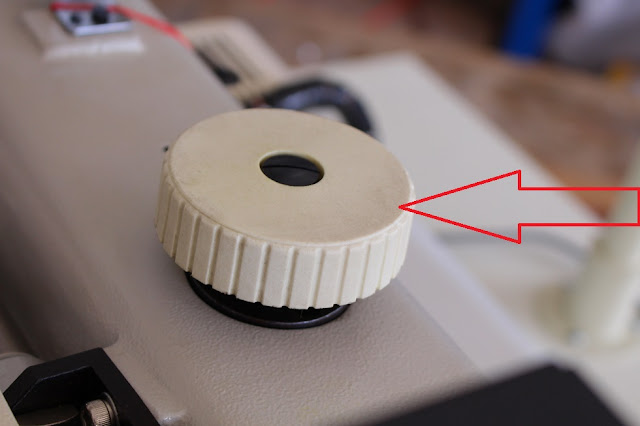
1. Please make sure teh needle hole in above picture is clear (no clamp and others block the hole, it is very important. If the clamp block the needle hole, the machine perhaps be damaged when you turn on the machine).
It is very very important, everytime before turn on the machine, please make sure the needle hole is clear!!! |
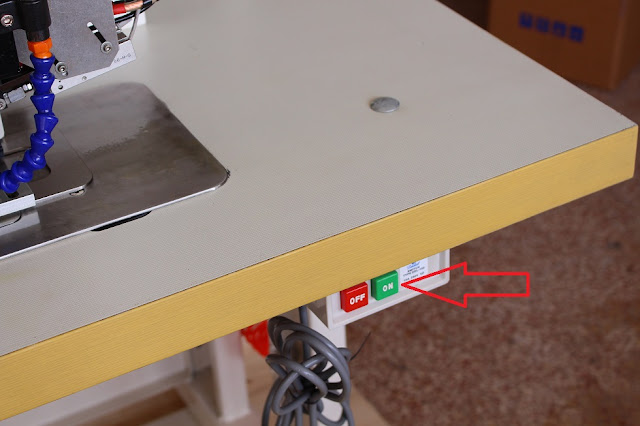 |
| 2. Turn on the machine. |
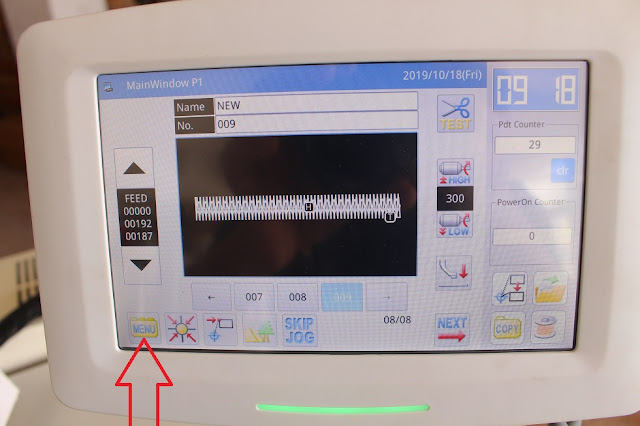 |
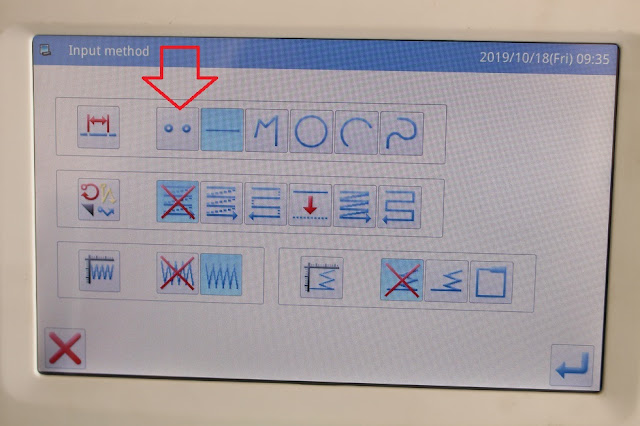
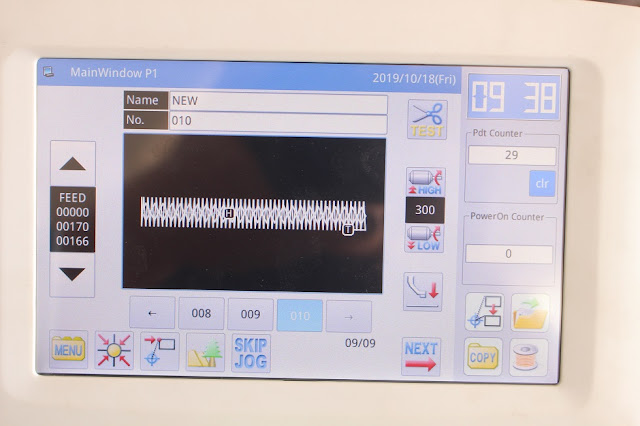
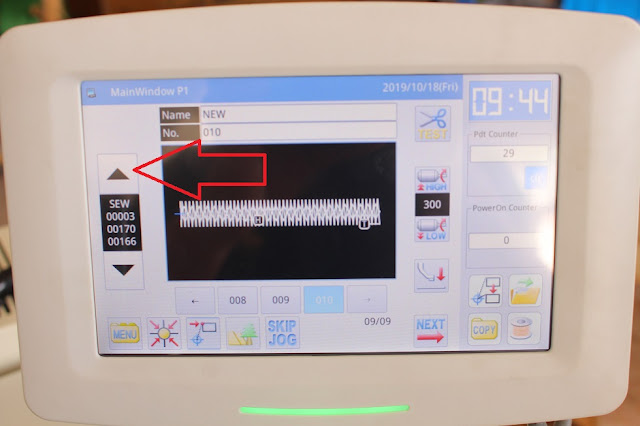
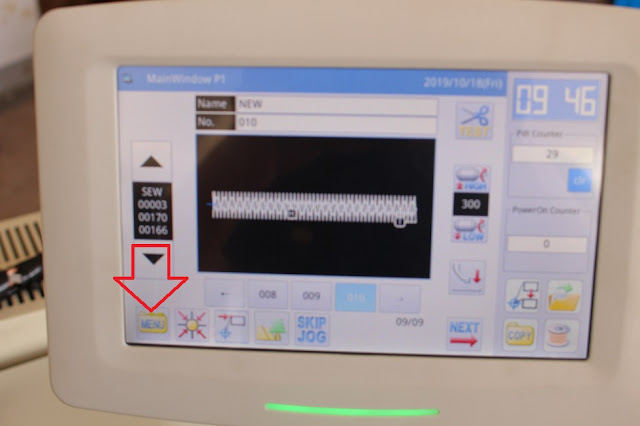
| 3. You will see above interface, then click the MENU. |
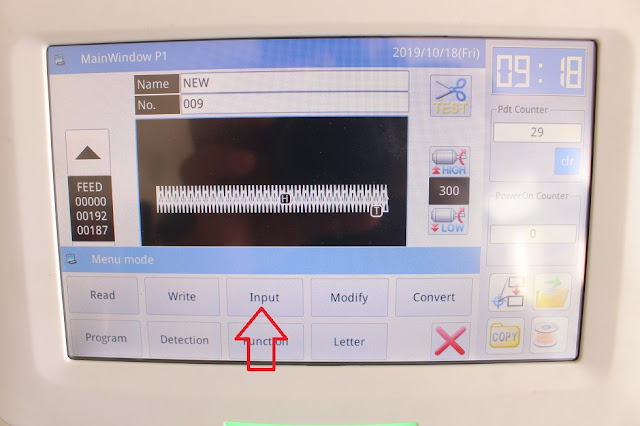 |
| 4. Click the "Input" |
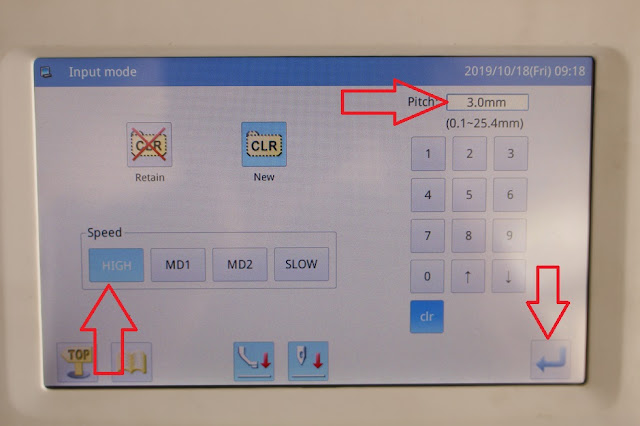 |
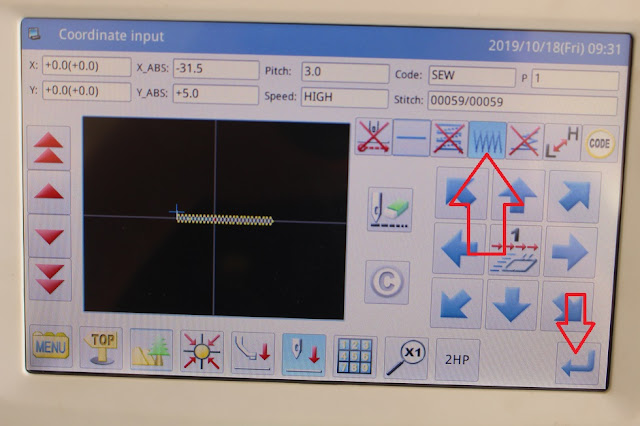
| 5. You will see above interface, note the HIGH speed and 3.0mm Pitch, default value, you do not need to change, just click the Enter key. |
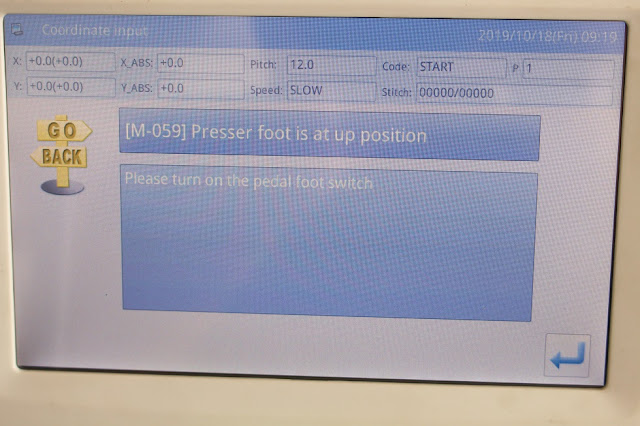 |
| 6. If you see above message, just press the RIGHT pedal switch. |
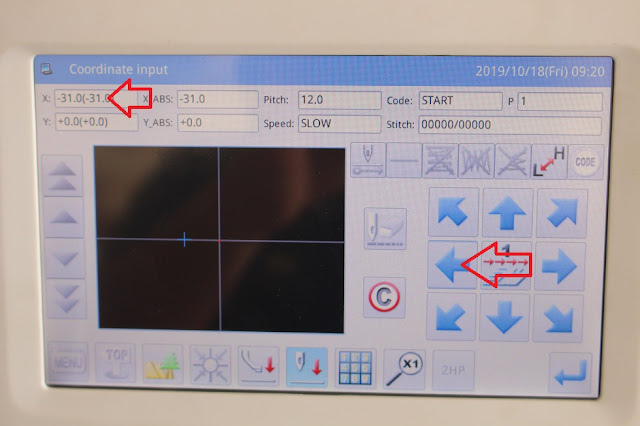 |
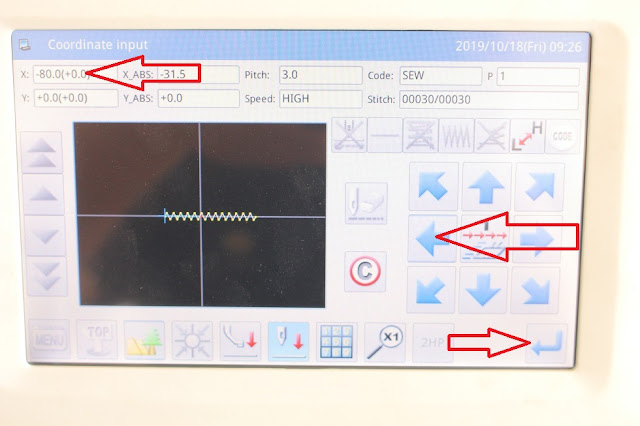
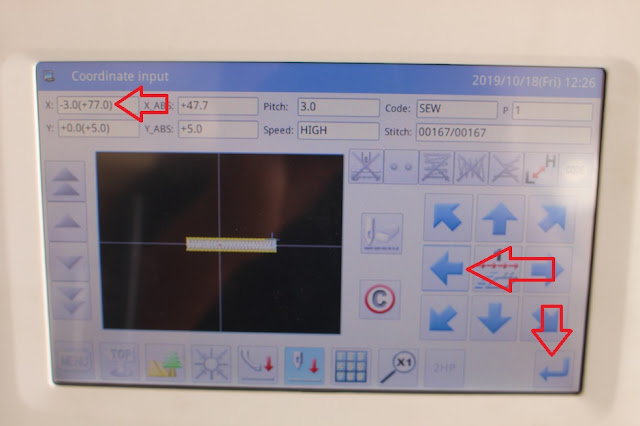
| 7. Press ON the left arrow, to set Start Sewing Point. Note the value of X about 30, then click the Enter Key for confirmation. |
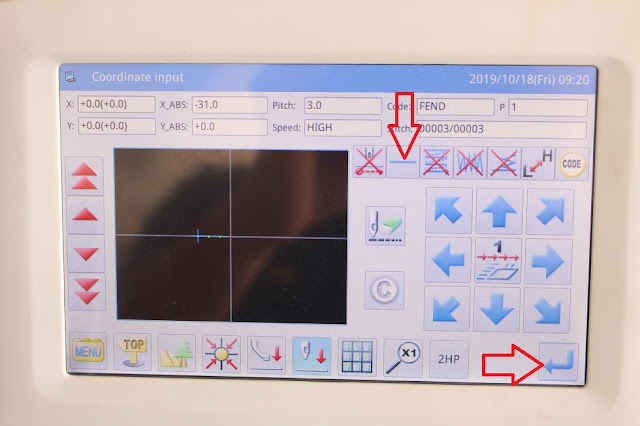 |
| 8. Click the line, and then Enter key, you will see below interface. |
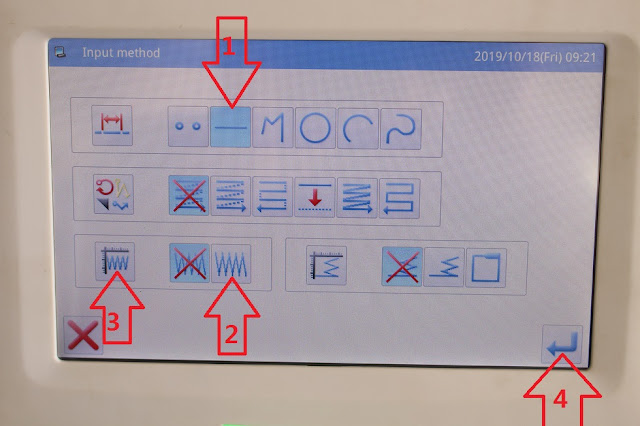 |
| 9. Click the key of 1, 2, 3, 4. |
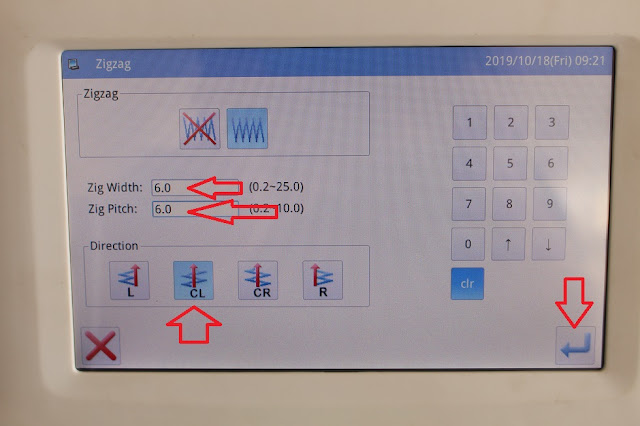 |
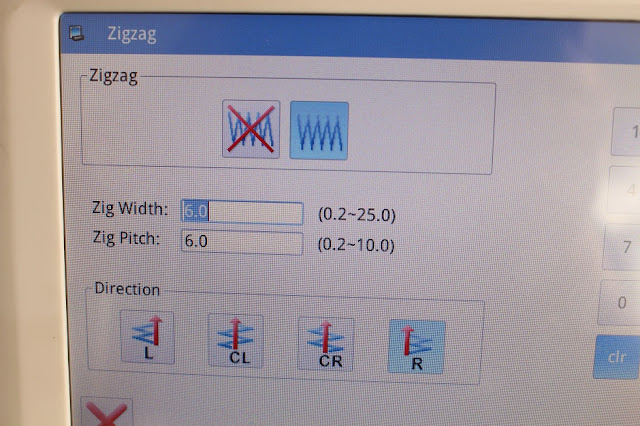
| 10. For the first zigzag seam, we usually set small width and long pitch, for better thread tension (6mm zigzag width for first and second zigzag seam can work for all ropes), Click "CL" and Enter key. |
 |
| 12. Click the Enter key for confirmation. |
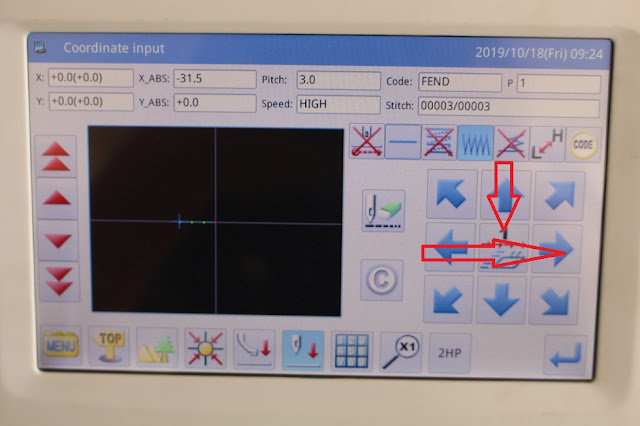 |
| 13. Press ON the right arrow, there is a number in the center of arrows, click it for different moving speed: 1 (slow), 2 (middle speed) and 3 (high speed). |
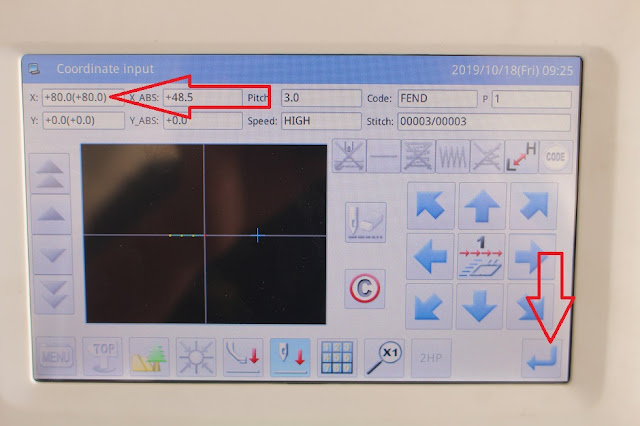 |
| 14. Following previous step, watch the X value, for example the bar tacking seam length is 80mm, when reach 80, click the Enter Key for confirmation. |
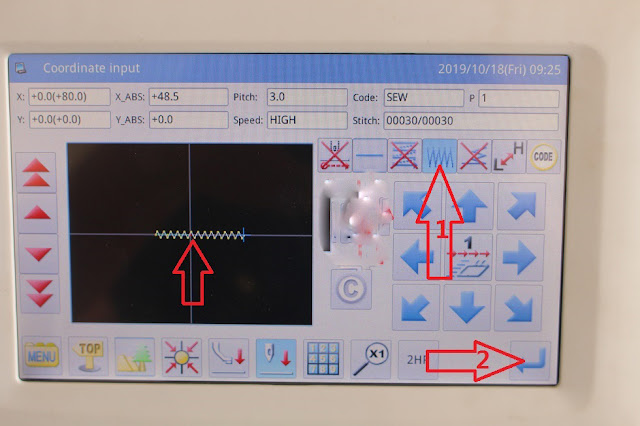 |
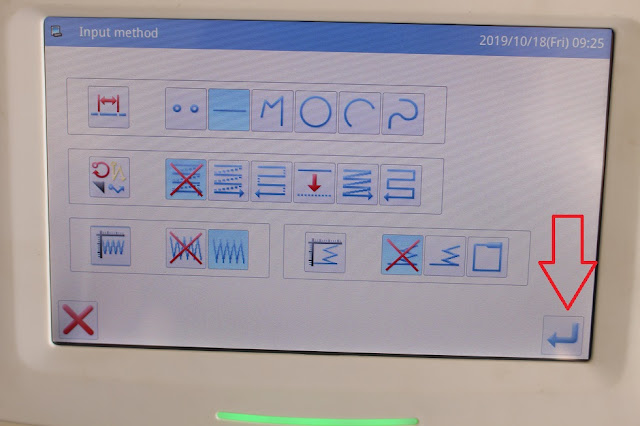
| 15. You will see the first zigzag seam in the screen, click the key 1 and 2. |
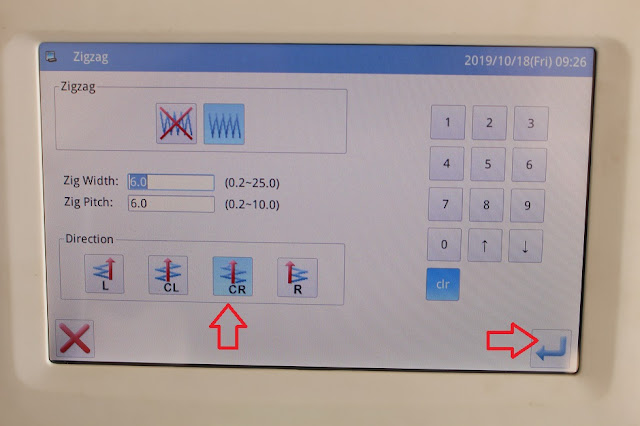 |
| 16. Click "CR" and Enter key. |
 |
| 17. Click Enter Key. |
 |
| 18. Click Left arrow, watch the X value to be 80, then click Enter Key. |
 |
| 18A. If the second zigzag seam is not in right direction, please click the key with red arrow, to cancel the previous operation (This step is not ncessary). |
 |
| 18B. After cancel the previous step, repeat step 15 to 18, but click "CL" (This step is not ncessary). |
 |
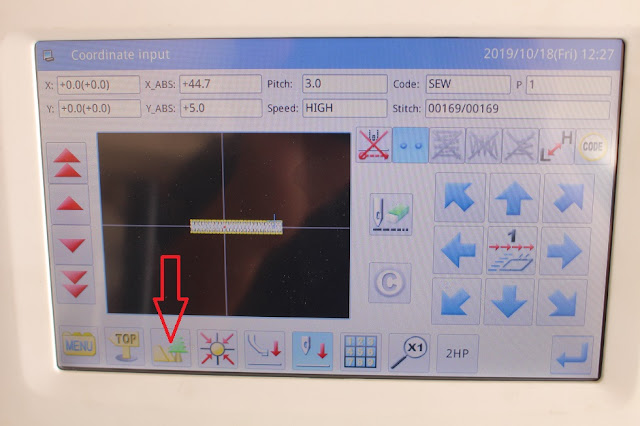
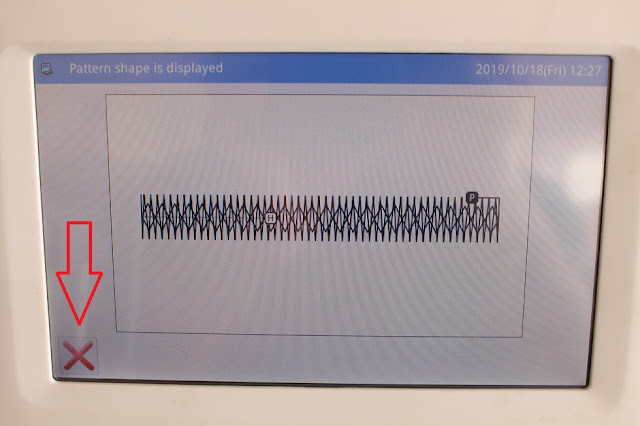
| 19. If the seam is correct, click the key with red arrow, for preview the sewing pattern. |
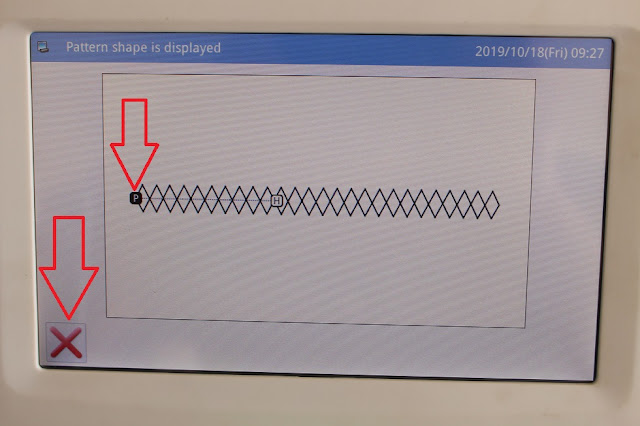 |
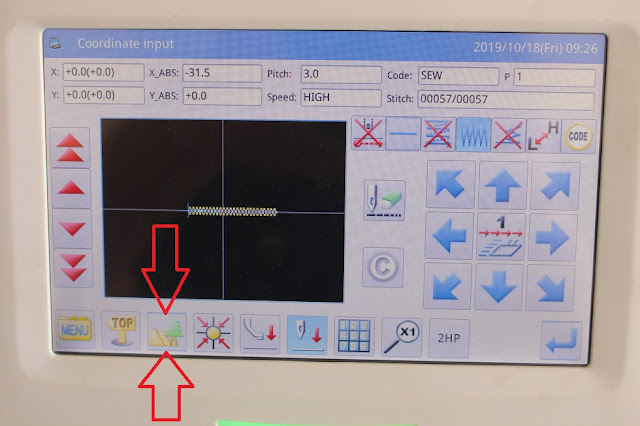
| 20. Close the preview by clicking X, and back to below interface, not the needle position (P) is at the middle of seam. |
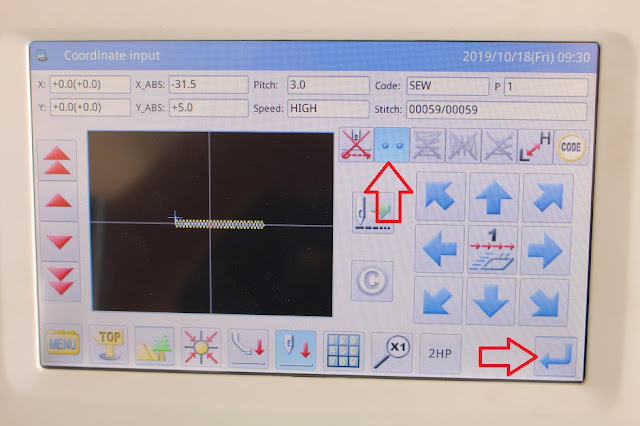 |
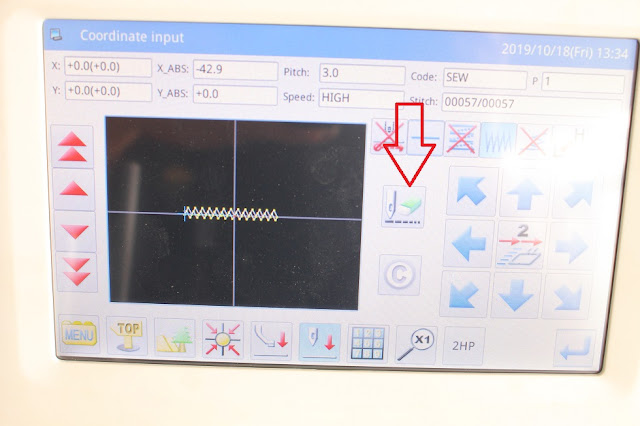
| 21. Click the key of spot stitch and Enter key, you will see below interface. |
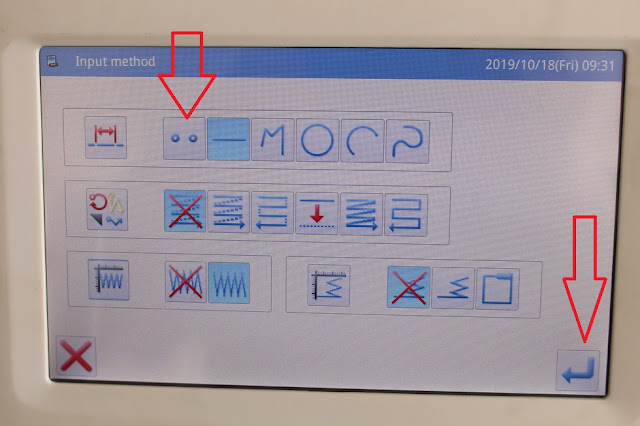 |
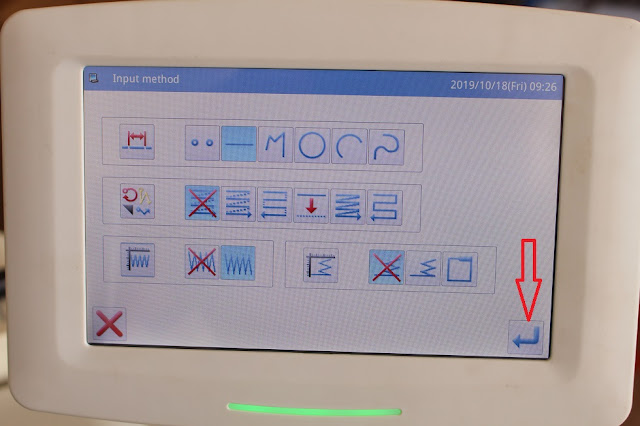
| 22. Select the spot stitch and click Enter key. |
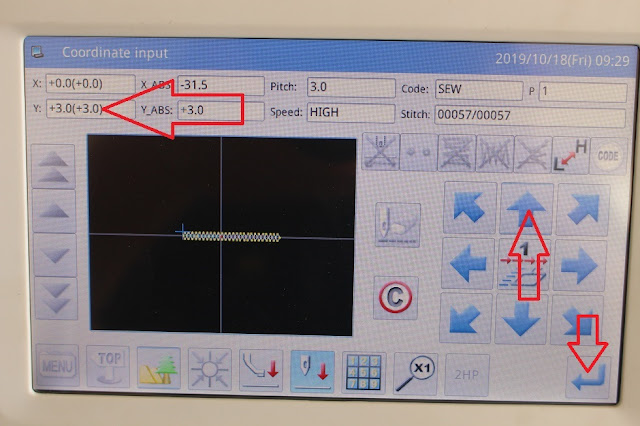 |
| 23. In picture #20, we noted the needle position at middle of 6mm wide seam), the third zigzag width should be 10mm. So we need to move up 5mm. Press on the UP arrow, still the Y value to be 5 (the number in above picture is 3, is not correct), then click Enter key. |
 |
| 24. Click the zigzag seams, and Enter key. |
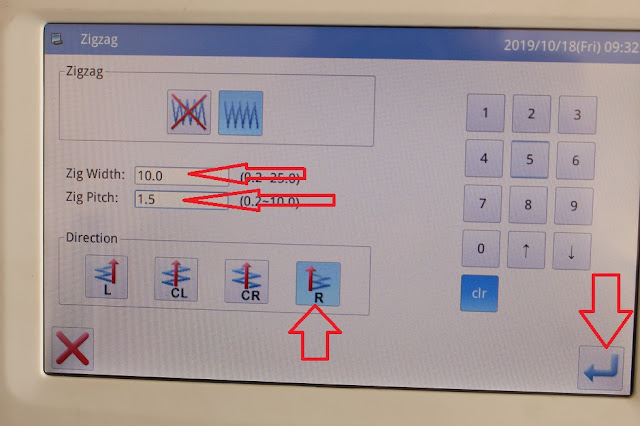 |
| 25. Input 10 (the third zigzag width should be 10mm), and 1.5 zig pitch, select R, then click Enter key. |
 |
| 26. Click Enter key. |
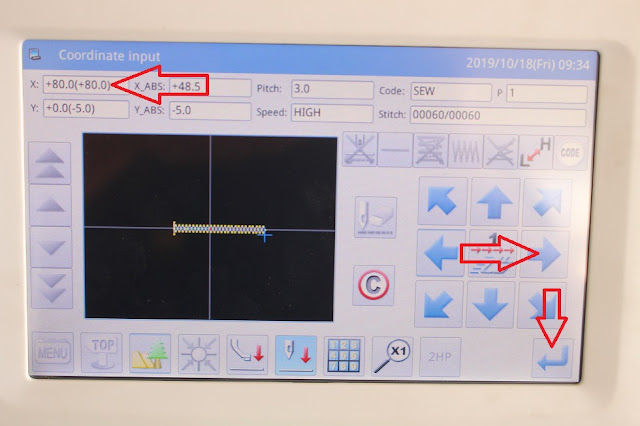 |
| 27. Press ON right arrow, till the X value reach 80, then click Enter key, you will see below interface. |
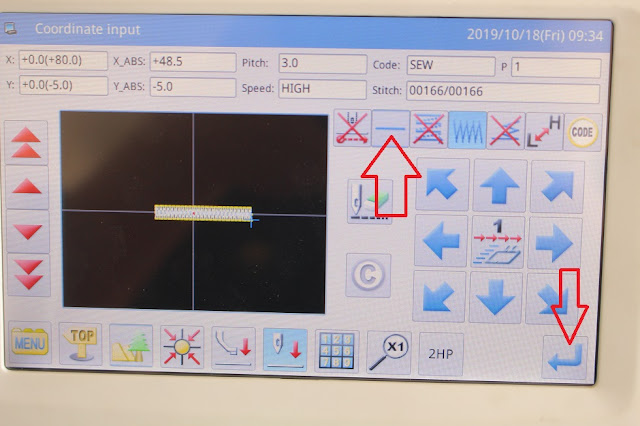 |
| 28. Click line key and Enter key, as above picture. |
 |
| 29. Select spot stitch and Enter key. |
 |
| 30. Press ON up arrow, still the Y value to 10, then click Enter key. |
 |
| 31. Press ON right arrow, till the X value to 3 (for reinforcement stitch), click Enter key. |
 |
| 32. Repeat step 31, for second reinforcement stitch. |
 |
| 33. Click for preview. |
 |
| 34. Close preview. |
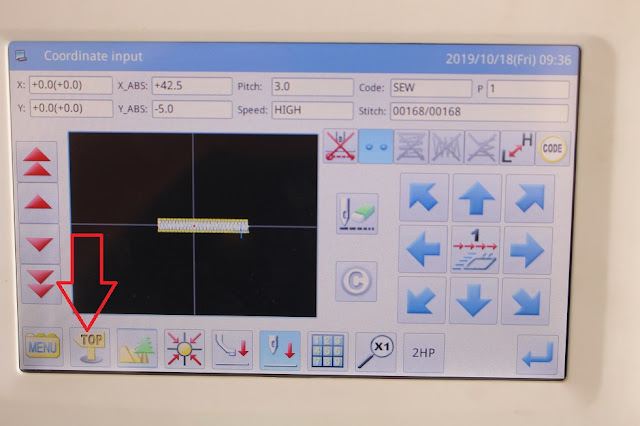 |
| 35. Click TOP. |
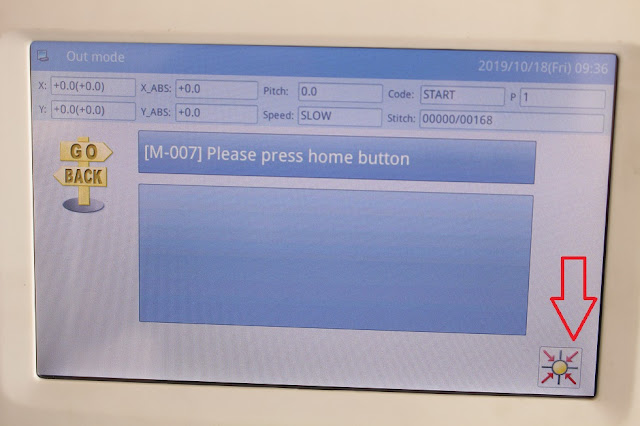 |
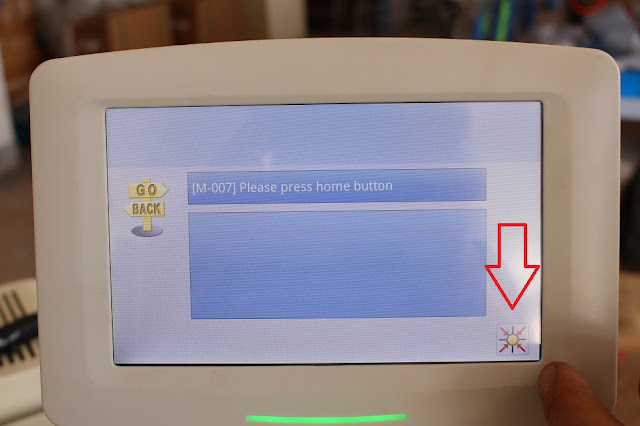
| 36. Click the home key. |
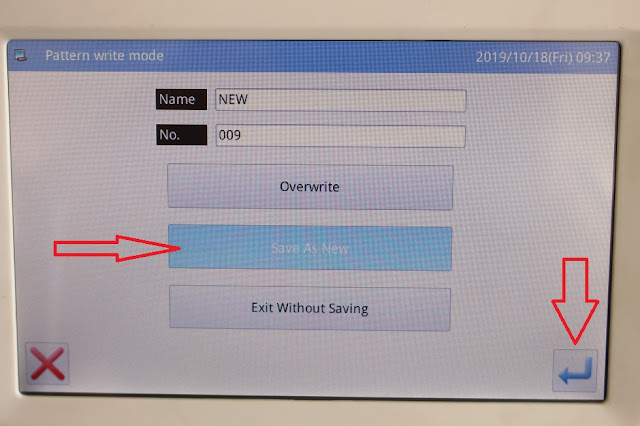 |
| 37. Select "Save As New" and click Enter key. |
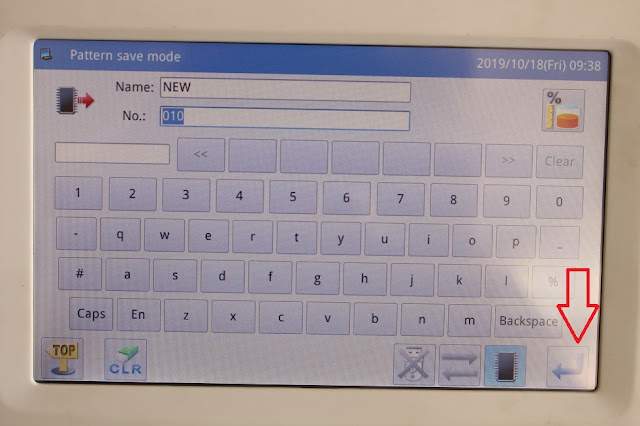 |
| 38. The number of pattern is 10, you can input with different number. |
 |
| 39. Above is new sewing pattern. |
 |
| 40. Insert rope, press right pedal switch to close the clamp. |
 |
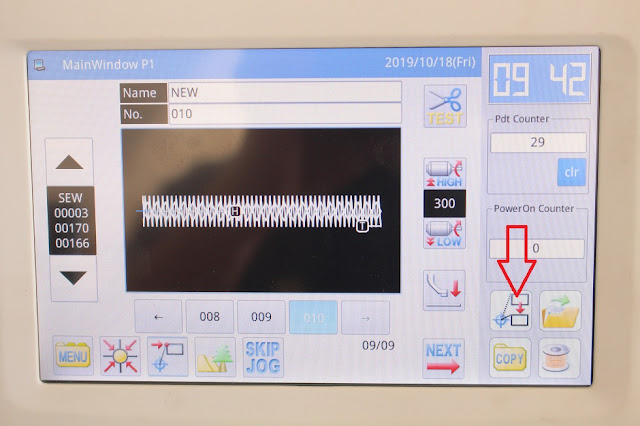
| 41. Click above key for backing to start sewing point. |
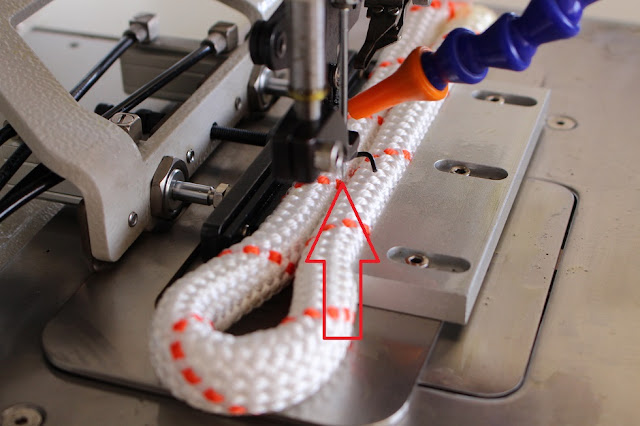 |
| 42. See above picture, the Start Sewing Point is not at the middle of rope. |
 |
| 43. Turn the wheel to down the needle (for better checking). |
 |
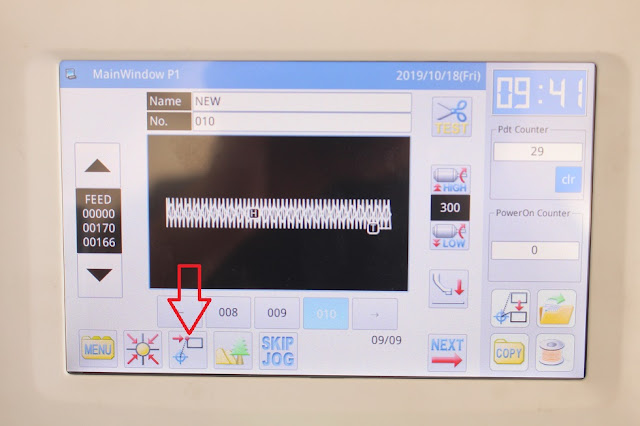
| 44. Click above key. |
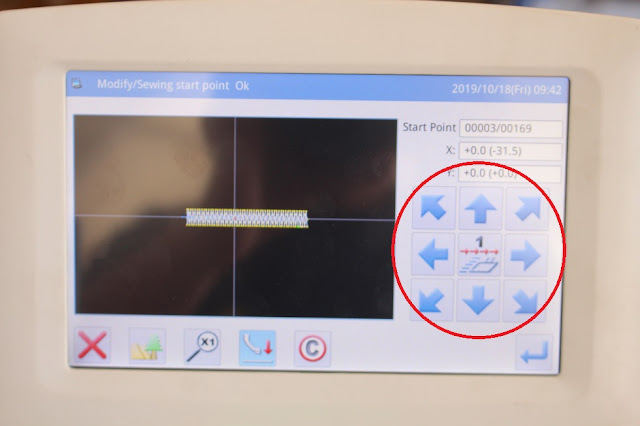 |
| 45. Click the arrows in the circle, move the clamp, make the needle to the center of ropes, as below picture, then click Enter key. |
 |
| 46. Click as above picture. |
 |
| 47. Press ON the UP arrow, for simulation, whach the movement of needle, check if it hit clamp or out of sewing area. |
 |
| 48. Turn the flywheel by hand, make the needle in LOWEST position, check the presser foot, it should lightly touch the rope. If not, you need to loosen the screw, adjust the height of presser foot. Now the machine is ready for sew. |
 |
| 49. After sewing the first rope, if you found it is difficult to take out the sewn rope, you need to set second origin point, click the MENU. |
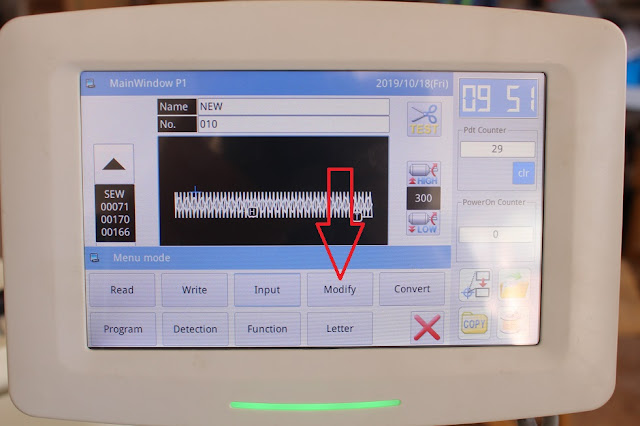 |
| 50. Click Modify. |
 |
| 51. CLick home position. |
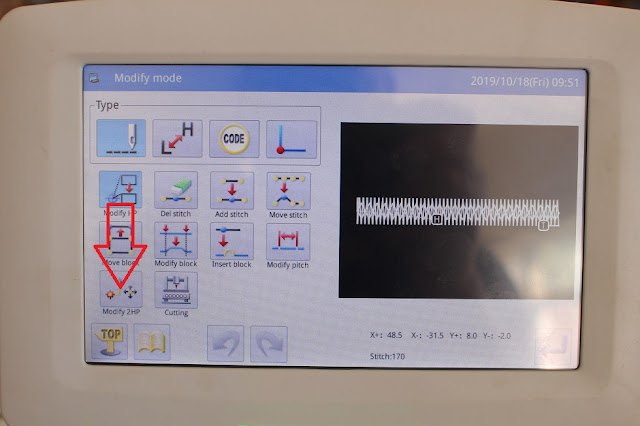 |
| 52. CLick Modify 2HP. |
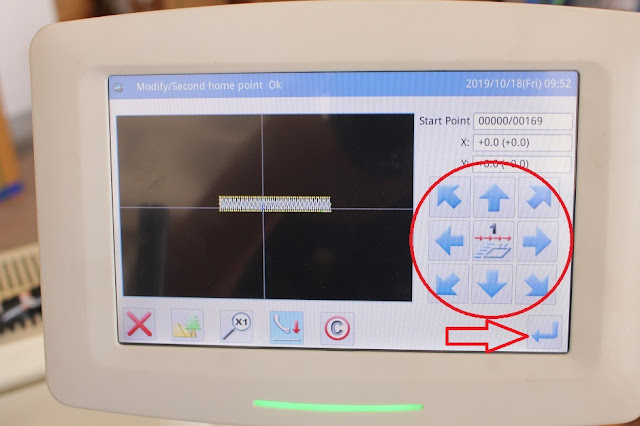 |
| 53. Click the arrows in circle, move the clamp to below position. |
 |
| 54. Click Enter key. |
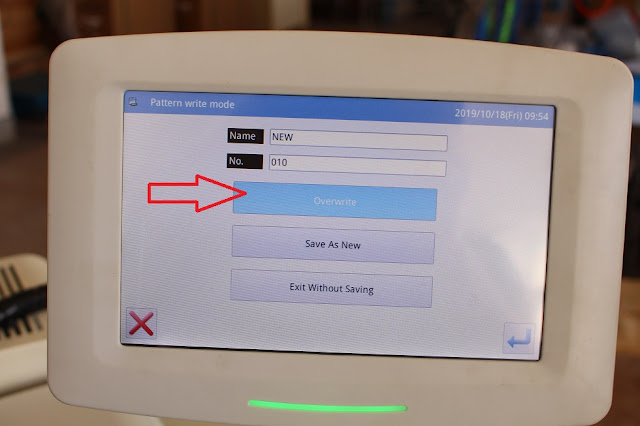 |
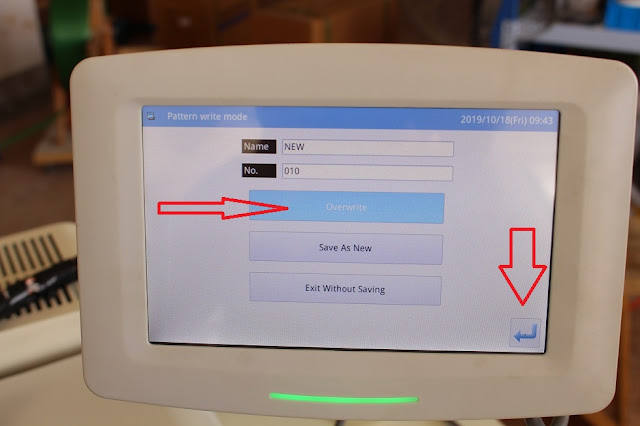
| 55. Click Overwrite and Enter key. |
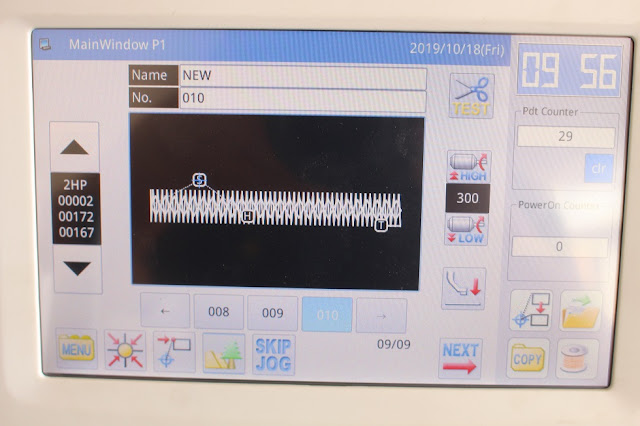 |
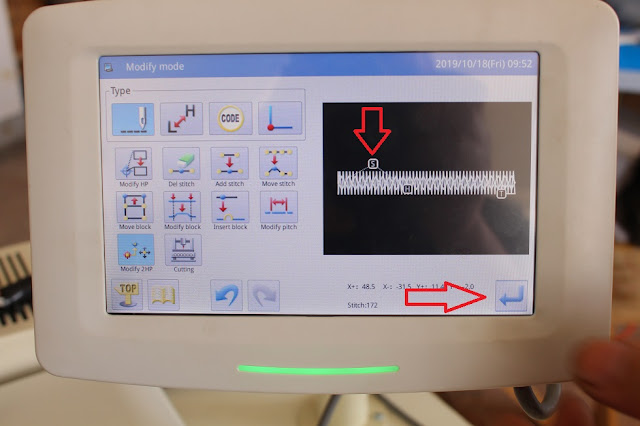
| 56. See above picture, in the new sewing pattern, S means second origin point, after each sewing, the clamp will move to a right position, convenient for load and unload ropes. |


没有评论:
发表评论